So are you tired of me talking about gardening yet?
No? Great! Because this is the only DIY currently going on in these parts.

To keep your garden beautiful, things need to grow well. And in my book, there's one sure fire way to get your plants to do what they're suppose to do. If you want them to flourish, you need to feed them. Plain soil isn't enough.
Having a compost out back is one super smart way to achieve food for your plants. For free! However there are a few tricks you'll want to know about.
How to build a compost pile (the FJI way)

1. Keep your compost weed free
I have two composts in the yard. This one located behind my character building is for WEEDS. And I know what you're thinking. Aren't they ALL for weeds? NO. I learned the hard way. If you throw weeds in your compost, you get weeds IN your rotted compost. And those weeds sprout in your garden next year. Again.

I have a rabbit hutch of all things that came with the house. And being that it was well ventilated on the sides, I started throwing 'clean' compost materials in it last summer.
2. Clean compost materials are:
Grass clippings, soil, raw fruit and veg scraps, egg shells, leaves, sod, etc. NO WEEDS.
(make sure you turn sod upside down or it'll keep growing)
3. Layer as you go
Compost experts will tell you to do this and that, add water, toss and spin. I didn't. I simply layered everything as I went and let the sun and rain do the rest.

Oh I know. What a gorgeous picture... you just can't dress up rotting vegetation, sorry.
So anyway... when I had finally weeded the horrific garden beds, (you can see HERE) it was time to feed them. I nearly purchased a truck load of mushroom manure complete with a-man-toting-a-shovel, but then I remembered our little pile of gold out back. So we set out to give it a whirl. It was the loveliest blackish brown ever!

4. Add peat moss to your compost

5. Do ALL the beds now before you realize how tired you really are.
Well now, I had such a fine time at the vegetable patch party, I couldn't help myself! I moved on to the birdhouse garden. BUT. The edges were terrible. Time to re-edge first.

Edging your flower beds (the FJI way)
1. Edge before you realize how tired you really are.
I like to re-edge all the soil-meets-grass edges at least once every year. Nothing looks better than a nice fresh sharp edge! And nothing fancy was used. I like my little half moon edger that's buried in the ground that you can't see. Oops.
And no, I don't lay out a garden hose first for that lovely perfect curve layout. I go for it and re cut to fix after wards. Not always the brightest way to go, but I get annoyed with a moving hose, so I just wing it. For really long lines, I always start with something as a rough guide, but end up without it anyway.

2. Try curves as opposed to straight
Think about it. Nature isn't straight so why is your garden? At times straight looks best, but more times than not, curves look better. All my gardens used to be lined with boxy landscape ties. I've ripped 80% of them out and did curved cut lines instead.
3. Easy-does-it curves make for easier lawn mowing.
And always remember what your lawn mower can handle naturally. If you have to push and pull 100 times because of a sharp corner, you'll despise yourself. Trimming to suit your given mower is my suggestion.
4. Mound the soil UP and AWAY from the cut edge
Please try this and thank me later because it'll look like you have a full time gardener working your property if you do this. Along the cut edge, I dig DEEP. Then mound the soil up and away from the edge. My gardener brother taught me this many moons ago (or I saw him do it or something) and I've done it ever since. If your soil is the same level as your lawn, it won't look as cool. Try the cool way first.
5. Trim your edge with an upside down weed eater.
I've tried fancy edgers to do the job at keeping your edges beautiful all summer long. But at the end of the day, I want it done yesterday. So as I chomp down the weeds with the weed eater, I just flip the unit upside down and run it along the edges. It works.

NOW the dynamic duo can come in and do their thing! More cake batter and we're nearly done. And I'm really glad because I have a neck and back that are total fuss pots driving me insane with their incessant whining.
So I'm really proud of myself. Things are clipping along in this yard. Finally!

And then I forgot about this part. See the line winding around that shrub? It's really really really REALLY neck-chatting long.
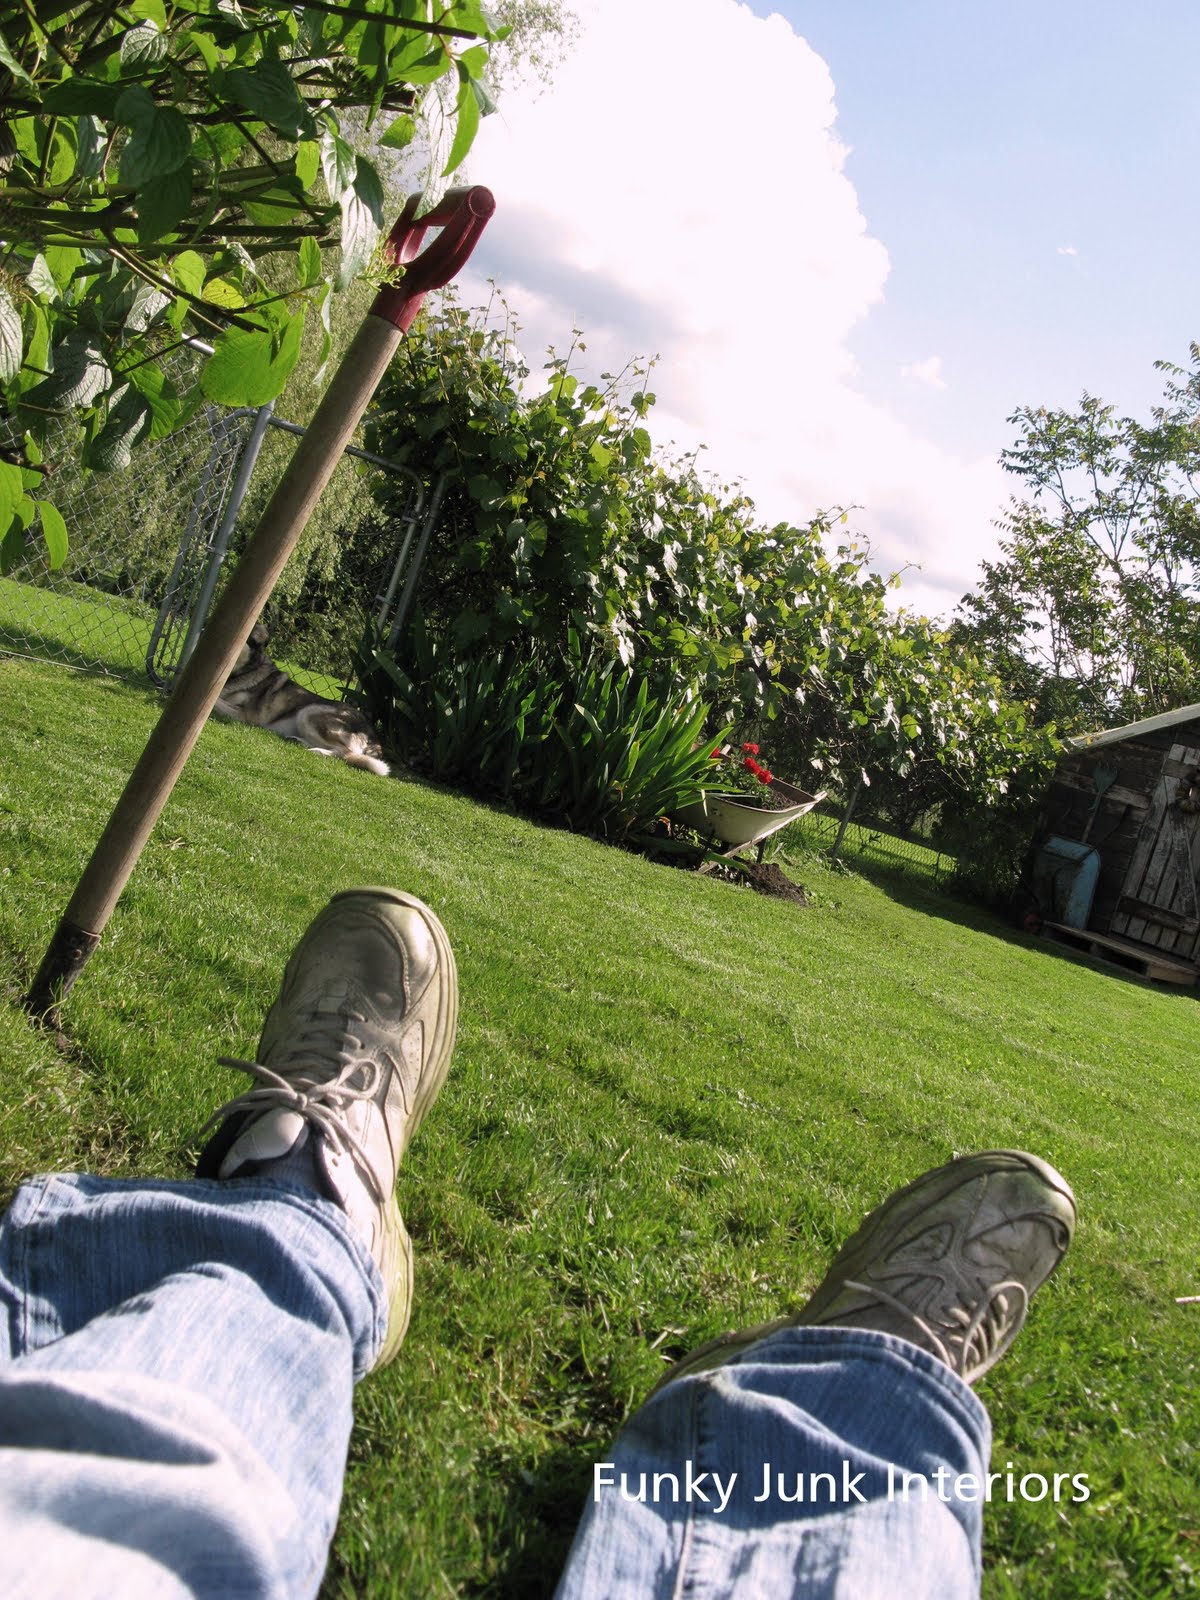
CLUNK. Quittin' time.
Got any fertilizer or trim tips? I'll never admit to knowing everything. But pretty darn close. :)

You can visit more gardening projects and tips in the Outdoors tab above.


Not tips, you covered them all, except maybe, weed your garden when it is really hot. It might suck for you, but any weeds that stay behind (as they always do) will dry out and die in no time.
ReplyDeleteI do not have grass in my garden. But I have lots of flower beds. I have been making compost for years, and this was the first year I actually started using it. I have these plastic containers to compost in (too small a garden for an open compost pile), and everytime I thought, I have enough to start using it, I would think later... and then when later was there it would have diminished tenfold, so I thought again, let's add some more scraps to it first.
I had an never growing compost heap. But this year some of my plants got glorious rich compost. They loved it!
The view from the last pic is so true....LOL I know how that feels. What I don't know is...besides digging the edges deep and curvy (I prefer curves versus straight too) is there ANYTHING that you've found to use for edging material that is actually attractive and cheap? I saw someone use buried upside down beer bottles in a magazine with just a bit of the bottle bottoms showing, but that looked like an accident waiting to happen. BTW, that's a great compost pile too. Pam @ Sallygoodin
ReplyDeleteBeautiful garden! I love all the curved edges too. That is definitely the way to go!!
ReplyDeleteThanks for the great tips on edging and composting. Mine just grows and grows too...I don't turn and flip and turn and flip. Guess I should give it a flip every now and then
Hugs
SueAnn
"Edge before your realize how tired you are," is the greatest and funniest tip I have heard in a long time. I like the way you think, Donna.
ReplyDeleteGreat post Donna, loved it! I love gardening too, even though I still have to be motivated to go and start all the jobs I have een putting off.
ReplyDeleteI agree with all your tips, especially the edging one, where I live, our useless grass loves invading the garden on a regular basis, so the 'trench' I dig between grass and garden not only looks good, but it serves a great purpose as well! I definately don't stop till I'm done, as my body shuts down before I even sit down...
Happy gardening!
:) Flick
Great tips. The one about edging is the best. I've been doing it that way for years. I don't use that plastic edging material. Drives me batty. I try to cut in towards the grass at a bit of an angle so the mulch goes under and pulling the edge by hand later in the year to tidy up is easier.
ReplyDeleteYour beds look great! Your hard work really paid off. I think I've been boring my readers with all my recent garden posts too, but I personally can't get enough of them around blogland.
ReplyDeleteI think we may be gardening kindred spirits! ;o)
I'm a HUGE believer of compost, and like you, never throw weeds in my compost bins. Learned that from a farming friend. I have smallish bins that don't produce a lot a compost - at least not enough for my veg garden (I purchase bags of composted cow manure for that), but my bins provide me with good amounts for amending the perennial beds and new plantings.
I'm a stickler for fresh edges too! I usually attack mine a couple times a season. I hate grass growing into the beds!
I love tip #5 under your "how to build a compost" section. So true!!! Have a fabulous day!
I never knew NOT to put weeds in the compost. Thank you so much- I will stop immediately before any more damage is done!!! Very helpful tips and advice.
ReplyDeleteI like the tip about cutting deep and mounding up high...I am no good with a shovel and have to do all this with a hand spade..arggh! It looks like it's worth all the hard work though! I love working the homemade compost into the crappy clay soil we have here...miraculous!
ReplyDeleteIt looks wonderful! Now will you come do mine!? lol:)
ReplyDeleteLaurie :)
Love this Donna! As you may know already I WING just about everything! That's how I edge too! And garden...We haven't started a compost yet. Next house for sure! In fact, I'm kinda excited about starting a compost at my new house. The strangest things put a smile on my face...hmm?
ReplyDeleteAnd the best advice DO EVERYTHING BEFORE YOU REALIZE HOW TIRED YOU ARE!!! Hahahaha! This is now my new mantra!!!!
Your last picture is so funny!!!!!! Laughed out loud!
#2 Pam,
ReplyDeleteWhat are good edging materials?
Honestly, I haven't fallen in love with anything out there. I prefer curvy lines and find if you simply keep the edges nicely trimmed, I prefer the above method the best.
In one place I lived I had a pro cement curvy curb installed. It looked really nice but bear in mind it's just a very different look. These days I prefer the english garden natural look. It's abit more work but to me, worth it.
For long lines say against a row of hedges, I currently have landscaping ties along one side of my yard. The other side of my yard has NO edging against the hedges so I've decided to simply let the grass grow and trim when I do the rest. And it looks fine. I may yank out the other side one day and do the same.
Other compost choices
I didn't cover this in the post. But back in the day, I'd always order up a TRUCKLOAD of soil/mushroom compost mix for my gardens. I always had the best gardens you'd ever see and never had to feed them mid season.
Chicken, horse, cow manure? Be careful! Loaded with weeds if not fully and properly cured.
Donna
ok will try this again. no grass here i live in the forest. when we moved here gave away the lawnmower ;).but i do compost got one of those spining composters works pretty good and you can move it. screened and put compost on garden last fall' plants pretty happy.its dry here so i do add water. but never thought about adding peat and i have a bunch of that.
ReplyDeleteread your story made me tear up. i have a special spot in my heart from single moms since i was one a number of yrs ago. i was lucky to meet my soul mate:). he doesnt always get the vision but allows me to do whatever. also i get the best presents. this anniversary got a dremel trio ;).
also when you did the sytycd, your designs appealed to me the most. guess its just the way i roll. so big fan here;)!!!!
Donna,
ReplyDeleteAfter years of me doing all the yard work, my sweet fella is doing most of it now. Heaven forbid I should give him any pointers, but, I so enjoyed your post. You write in such a fun in interesting, and yet beneficial way.
Thanks for having such a fun place to visit.
blessings
barbara jean
You're so right about needing the compost every year. If you skip that step you can sure tell. Why don't more people make curved lines? They really make the garden interesting. Good luck and hope your back holds out!
ReplyDeleteI've never cut in my my edging like that. I'm going to try it in my shade garden.
ReplyDeleteOh, I love your advice of curvy, no edging, lines. You are so right. The crisp clean look of edged gardens are okay for awhile, but the weeds creep up to it and it's not crisp for long. I definitely need a compost pile! I guess I'll put up with what I have this year and plan next year's right. Thanks for the advice!.
ReplyDeleteYou haven't lived until you have "double bug" a garden...OUCH! you are right don't give in to the pain....smiles.
ReplyDeleteI love compost... so agree that it helps plants thrive. Don't forget the red wiggler worms - they are essential to breaking down the material - and they multiply like rabbits (perfect for your rabbit hutch) if given a nice home. If you don't already have a plethora of rew wigglers, take a piece of cardboard, get one side wet, place the wet side down in the dirt, wait a few days, then flip it over. The wigglers are attracted to the glue on the cardboard... there you have it, more wigglers, and you can throw the whole thing in your compost.
ReplyDeleteHere in the Pacific NW - we have yard debris bins that the city picks up. That is what all of my weeds, as well as any pruned branches that are diseased are put. Then I leave the good stuff for the compost bin. If you have a paper shredder, you can always throw shredded paper ( those credit card offers) into your compost bin. Apart from turning it frequently, be sure to hose it down and keep it moist, that helps with breaking it down faster. I just keep the top off so when it is raining, things get soaked.
Love your blog BTW!
Coleen, for a compost bin, all you need is a corner in your yard. Box it in if you wish, but you don't even HAVE to do that. You just need a place to grow a pile and have it ok. The good compost bin of mine is very handy as it's located right beside my patio, so I can simply play target with hand flung veggies. Pick a spot near your kitchen so you can fling as well. :)
ReplyDeleteJeralee... paper?!? I didn't know that. But I do now. :) Thanks for the tip! I've also heard coffee grounds are good too.
Katie, warning. You cut an edge once like this and you'll be doing all your beds. It's hard work to create new edges but once done, fairly easy to upkeep.
BJ, yeah, don't say a word. He's doing GREAT!! Just great! (wink)
Green Coleen, does your guy have a single brother? He sounds like a dream.. :)
Donna
No need for a compost class now. You just gave me one!
ReplyDeleteI do garden maintenance for a living Donna, and your tips are right on! That's how we do our edges, they look good all yr. if you do the weed eater every week( well, at least every other) :)Your gardens look great!
ReplyDeleteaw donna he's one of a kind. sorry .i so wish everyone could know the closeness we have. guess we let each other be who we are. hes not perfect but perfect for me ;).
ReplyDeletealso watched the video of the electrical cord true genious ;). thats going to make me look really smart some day.
You have entirely too much energy for me girl! :)
ReplyDeleteLUV IT! Another tip on a super cheap compost bins! This is what we did, use pallets as your walls/sides and hold them in place with T posts or metal fence posts! Works great we have a 3 section compost bin!
ReplyDeleteThanks so much for this post!! I also try to re-edge this time every year but I have never tried mounding the soil up and away... what a GREAT tip!! I get frustrated every year after we lay bark because it never looks as neat but I think this will help! Too bad that I'm almost 9 months pregnant and pooped before I even begin :) Thanks!!
ReplyDeleteWhat a fun (and motivating)post!! :) I'm working on my flower beds, too!!! Sweating and hurting right along with you! :) I find that when I dig out new edges, I always tend to widen a bit b/c the grass seems to move in on the bed by the time the next year comes around. So when I dig the new edge (as you did) I usually just flip the dirt side up and let it sit there for a few days, trying to do as many flower beds as I can. Yes, it doesn't look very pretty for those few days, but that seems to give the dirt time to dry out (as long as no rain is in the forecast). Then I can come back and smack the dirt out of the chunks much easier. I also dig up overgrown perennials and divide them and pot them up for a plant sale I have every year in May. I do this as I move along the flower beds as well. I could just live outside in the spring, couldn't you?! :)
ReplyDeleteHeavens to Betsy...I am just tired looking at your pictures. I LOVE to work in the yard, but with an acre of manicured lawn and beds it is NEVER all done...we haven't lived here long and they left them all in a mess. The previous owners had them professionally done and these owners just let them go. We inherited the glorious mess.....it will one day be glorious again, but our lawn boy is our 16 year old son and the other 5 siblings (well, the other 2, since the other 3 are under 3). Thanks for the great pictures. I think I'm going for the pallet sidewalk through one of the LARGE flower beds.
Delete